How to photograph the Northern Lights
For years I’ve been chasing the northern lights. It was my number one on my bucket list. Hours I’ve spent outside staring into the darkness or in a car, trying to stay warm but almost shivering my skin off. But I can tell you, it was worth every attempt, every cloudy sky, every moment waiting.
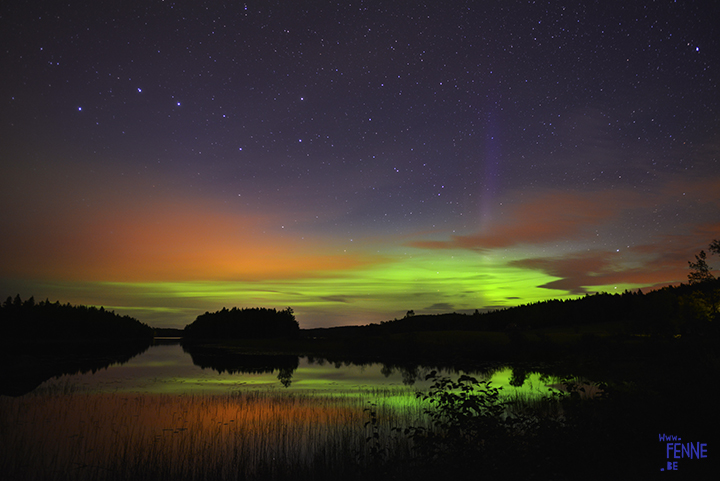
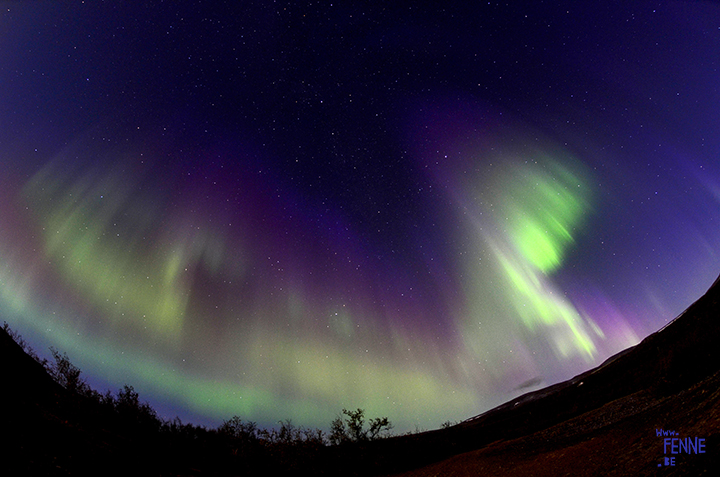
The moment I saw- and photographed- the aurora borealis is one of the heights of my travels. And the magic does not disappear with every time the sky is lightened again. It’s almost impossible to describe. It felt like the purest magic by nature. It made me feel so small as well as energized and inspired.
As a photographer, seeing (almost) equals photographing, and I hope of course that you enjoy seeing some images, but I can tell you this: the best things you have to chase yourself. Going out, facing adventure and living the night as well as the day. To give you as much of a start as I can, I’ll write down some tips on photographing the northern lights.
1. What you need
– camera (preferably DSLR or a camera that you can adjust manually)
– memory card
– tripod
– wide angle lens
– warm clothes
2. Be prepared.
You can just go with the flow and bet for luck if that’s more your style, but wanting so see this so badly I prepare by first of all make sure my camera gear is ready for action and secondly keep an eye on the forecast.
You can prepare your gear by making sure the batteries are charged. If it will be VERY cold outside, you might want to keep a second one in a warm pocket as the cold eats your batteries. Before the night falls, check your camera settings and set everything ready to go: camera bag, tripod, blankets,…
3. Take test-shots
Our eyes are not as sensitive as a camera with a long shutter speed. If the aurora is very bright you will definitely recognize it, but there are 3 reasons why it’s useful to make a test shot:
First of all the northern lights aren’t always very bright. They might start soft and almost looking like a thin cloud gently crossing the sky.
Secondly, our eyes are not as sensitive as the camera with a long shutter speed. Before I had an app to check the sky, I made test shots to see if there was any activity going on.
And the third reason is to be sure of your exposure and composition. Not every night is the same. With a bright moon your exposure will be different from a pitch black night.
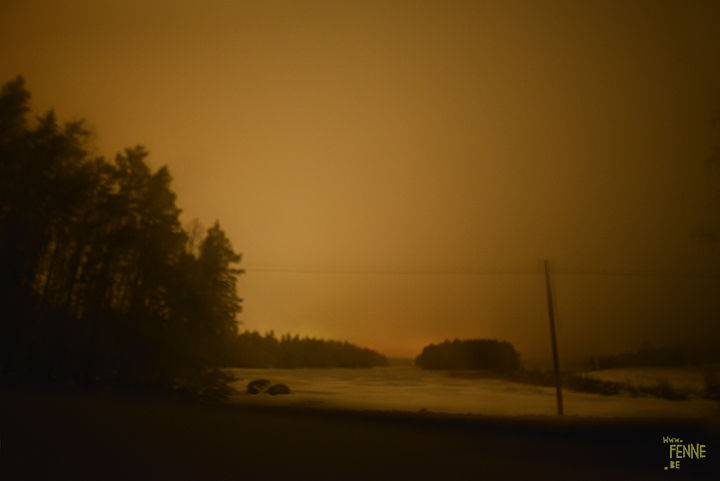
Just a test shot from the dashboard inside the car. In the middle of a snow blizzard we were waiting for a chance to see the lights. With KP 6.5 they were there but sadly invisible to us.
We could only see some activity going on at the horizon. Or maybe we thought to see something. But my camera definitely caught the northern lights!

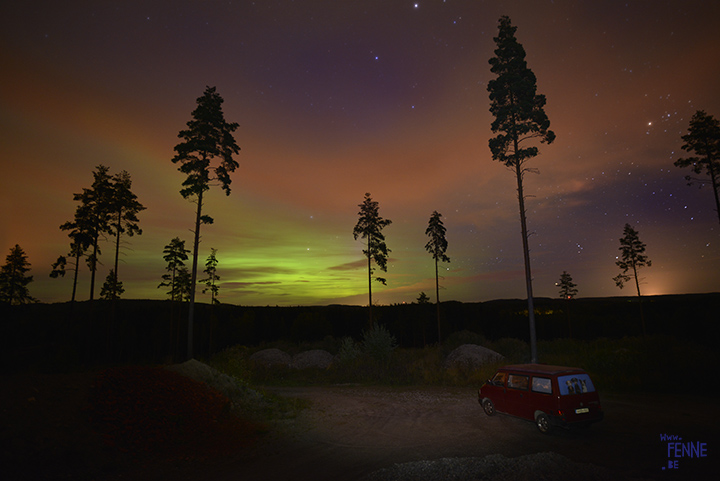
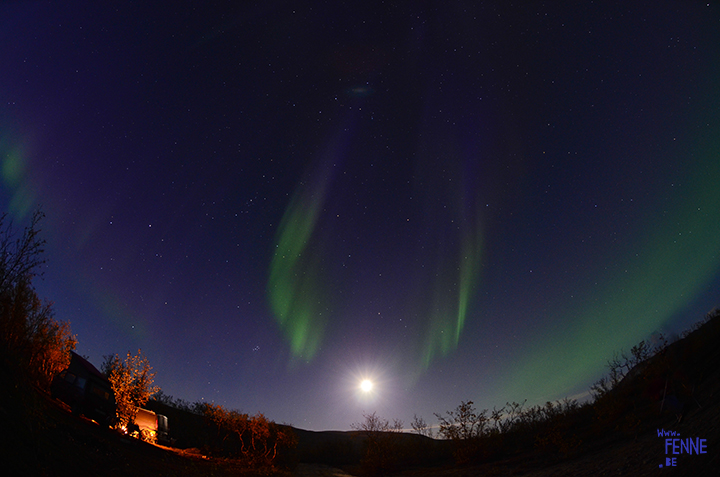
Playing with adding flash and setting.
4. Focusing at night.
While autofocus works great during the day, at night, especially a very dark night, you have to work a little different. On most lenses you can find a little window with underneath some numbers, expressing a distance. Looks for the infinity symbol: ‘∞’ and manually adjust. You will find out how accurate the results will be by trial and error. Most lenses need a bit of adjustment to get a really sharp image but it’s a good starting point. This can also be tested during the day while using autofocus and then use tape or a mark to save this setting for the night.
5. Camera settings.
I will tell you right away: there is not one magical perfect setting. But of course some tips will get you started. Everything depends on the conditions and your camera gear.
ISO: high ISO. I mostly use ISO800 but you might need ISO 1000 or more. Just try to keep it as low as possible, depending on how much noise your camera produces with low light.
Aperture: wide open. I would recommend f2 or 2.8 to get results with enough sharpness but still allow you to keep the ISO (just a little bit) down. If your lens has for example 4.0 as widest option, you will need an higher ISO (and end up with more noise)
Focal length: This is probably what we call in Flemish ‘mensengoesting’, which means it depends on your own taste. I like the combination of my D7000 with 10mm but this gives a lot of distortion- and I like that but some people hate it. With the D800 I mostly go for 20mm but with less activity high up the sky where we live, I could also use 35mm for example. The reason why I mostly go for 20mm is that if the lights will be all over the sky, I don’t want to miss the full effect.
Shutter speed: Mostly between 15sec and 30sec, depending on the time of the day (just after sunset or deep in the night), moonlight and how strong the lights themselves are.
6. When, where, how?
When: During the dark(er) months of the year after sunset. It’s no use to look for them during midsommar :-). However winter is mostly suggested, I spotted the aurora the first time in September- my lucky month I guess. The advantage of late summer and early autumn are of course the more comfortable temperatures.
Where: North for the Northern lights. That might be Sweden, Finland, Norway and Iceland for Europe. Not only the Nordics obviously give you a better chance, outside the city there is almost no light pollution (coming from Belgium, a new sensation). On very active times you might be lucky to see the Northern Light even in the Netherlands or Scotland- but if you REALLY want to experience them, I would suggest not to wait for that.
How: Keep an eye on the forecast, both for solar activity as the weather. A crisp clear sky is the best. I use ‘My aurora forecast‘ as well as ‘Aurora nowcast‘ – both free apps.
I wish you all the best with the chase and I hope these tips will help you get the shot! I would – of course- love to hear your feedback and how you felt by seeing the Northern lights.